
Advanced image optimization setup
NOTE: This article is about Fastly Image Optimization (Fastly IO) for CDN services. Fastly IO is available for Compute using Fastly's Beta program. To enable Fastly IO for Compute, contact support.
If you have advanced configuration needs, you can use VCL to define how image assets are processed by Fastly Image Optimizer (Fastly IO).
After enabling Fastly IO, follow this process to use image optimization:
- Add the Fastly Image Optimizer header.
- Create a request condition to define which image assets are routed via Fastly IO.
- Activate your changes.
- Test an image to confirm things are working as expected.
- Configure the File type and routing settings to use the Advanced configuration.
Add the Fastly Image Optimizer header
Once image optimization has been enabled for your service, configure your service by adding the Fastly Image Optimizer header.
- Log in to the Fastly control panel.
- From the Home page, select the appropriate service. You can use the search box to search by ID, name, or domain.
- Click Edit configuration and then select the option to clone the active version.
- Click Content.
Click Create header.
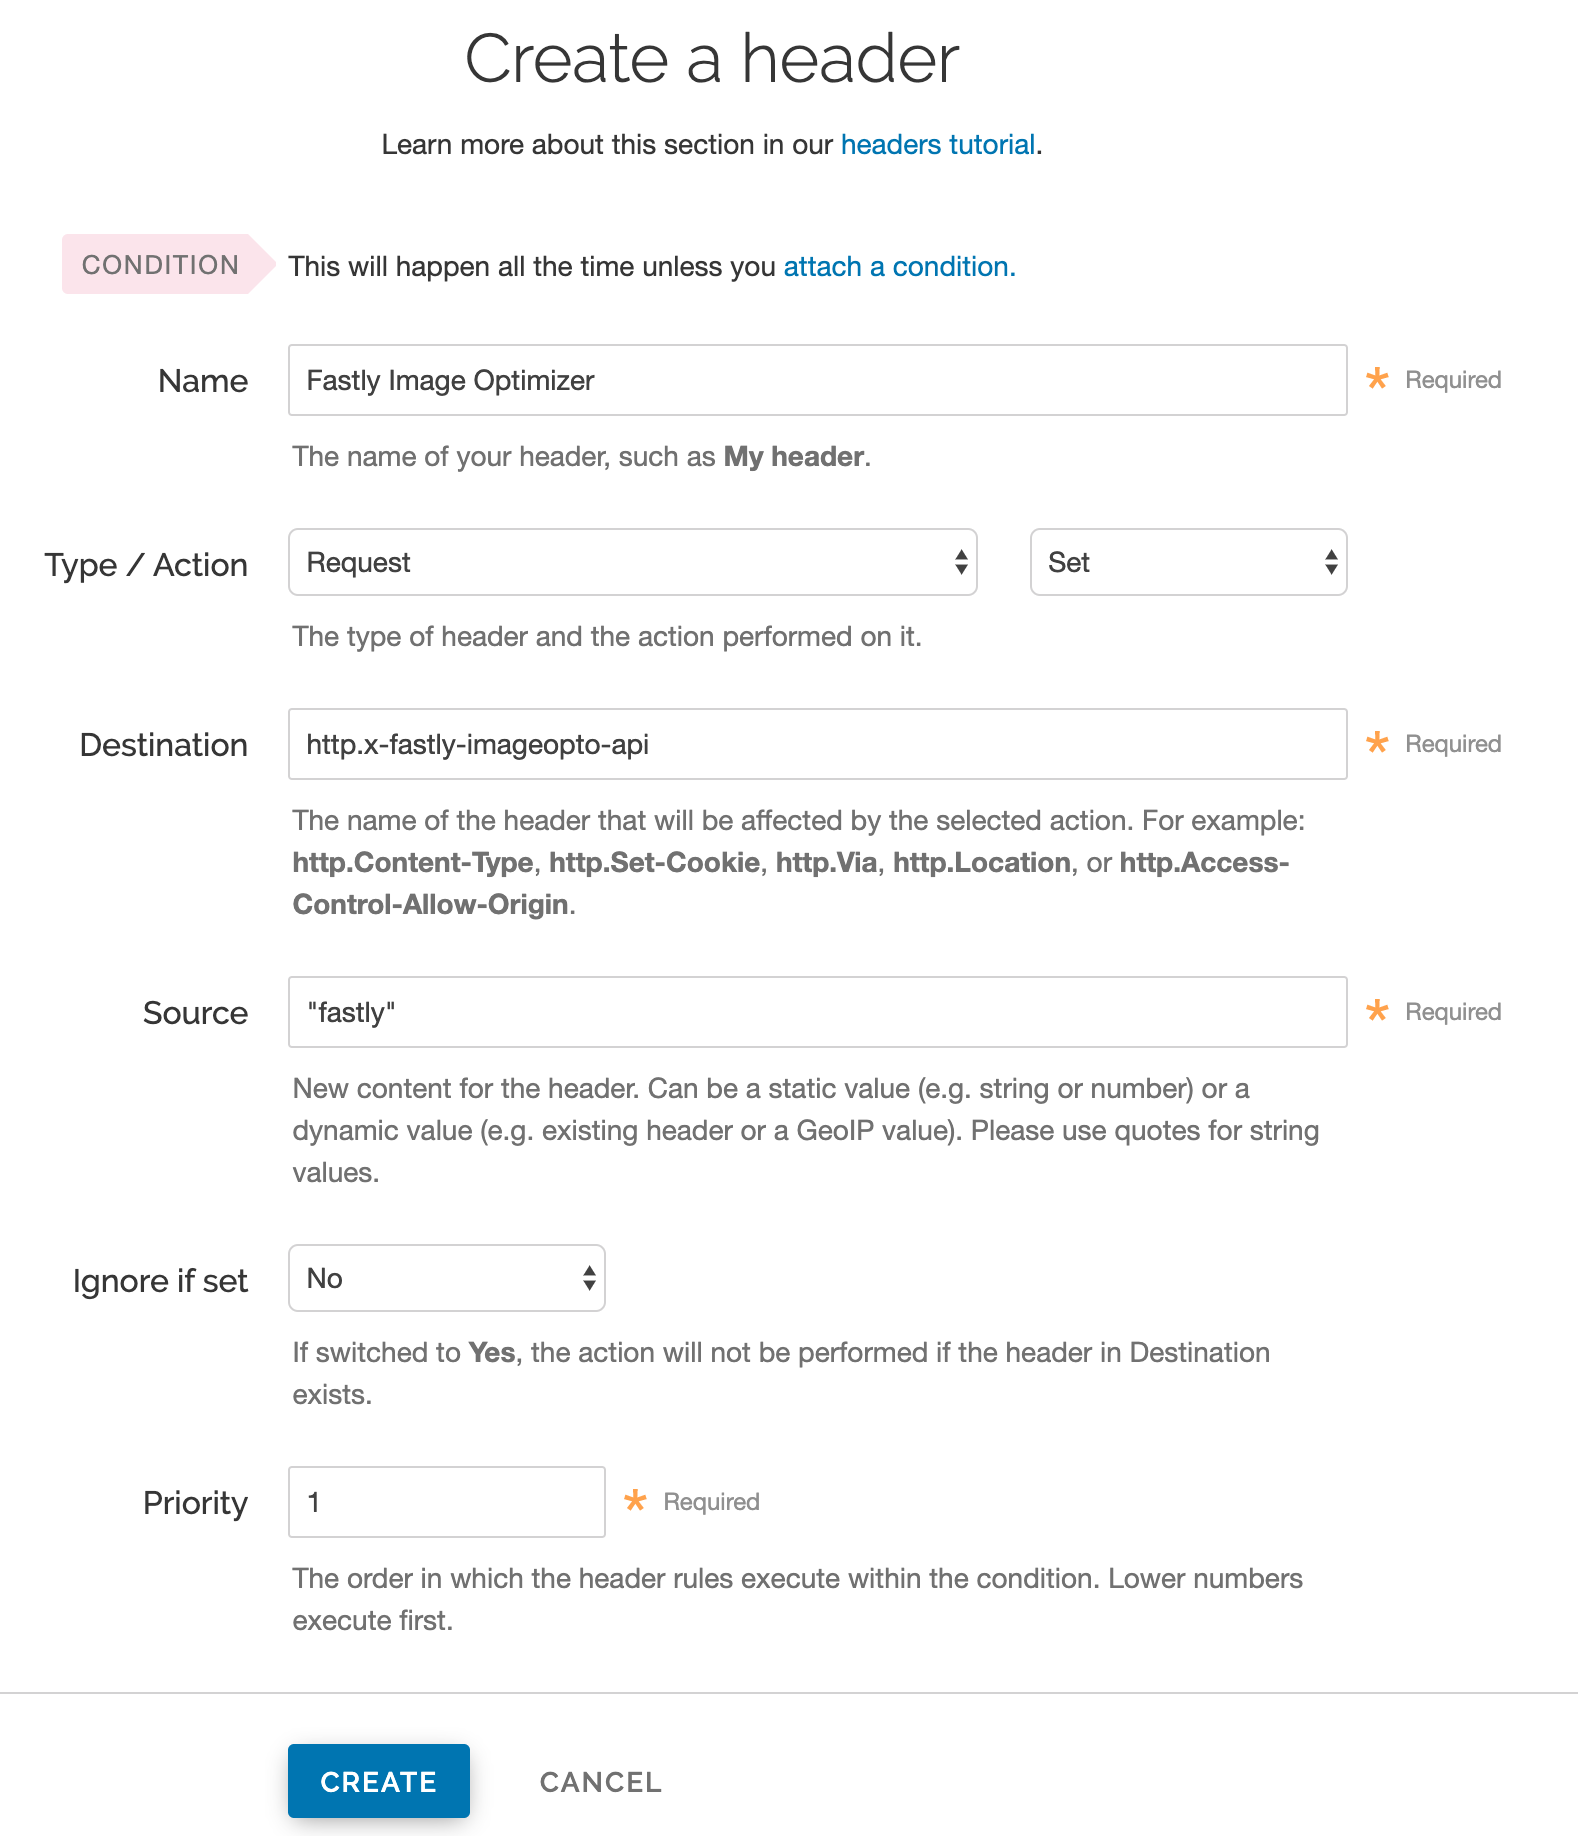
Fill out the Create a header window as follows:
- In the Name field, enter
Fastly Image Optimizer. - From the Type menu, select Request, and from the Action menu, select Set.
- In the Destination field, enter
http.X-Fastly-Imageopto-Api. - In the Source field, enter
"fastly". By default, Fastly IO removes any additional query string parameters that are not part of our image API. If your source image requires delivery of additional query string parameters from origin then enter"fastly; qp=*"instead. - From the Ignore if set menu, select No.
- In the Priority field, enter
1.
- In the Name field, enter
Click Create to create the new header.
HINT: For more help with adding or modifying headers, see our guide.
Create a request condition
To ensure only your image assets are routed via Fastly IO, create a request condition.
Click Attach a condition next to the
Fastly Image Optimizerheader.Click Create a new request condition.

Fill out the Create a new request condition window as follows:
- In the Name field, enter a descriptive name for the new condition (for example,
Fastly Image Optimizer Request Condition). - In the Apply if field, enter the appropriate request condition. For example,
req.url.ext ~ "(?i)^(gif|png|jpe?g|webp|avif|jxl|heic)$"will send all files with GIF, PNG, JPG, JPEG, WEBP, AVIF, JXL, and HEIC extensions via Fastly IO. Likewise,req.url ~ "^/images/"will send all files in theimagesdirectory.
- In the Name field, enter a descriptive name for the new condition (for example,
Click Save and apply to create the new condition for the header.
- From the Activate menu, select Activate on Production to deploy your configuration changes.
HINT: For more help using conditions, see our guide.
Confirm everything is working
Once you've activated your changes, check to see if Fastly IO is processing your image request by typing the following command on the command line:
$ echo -n "Image Width: " ; curl -sI "https://www.fastly.io/image.jpg?width=200" | grep -i "Fastly-Io-Info:" | cut -d' ' -f6 | cut -d= -f2 | cut -dx -f1Replace https://www.fastly.io/image.jpg?width=200 with the full image URL and width of the image you're testing.
The command line output will display the image's width, which should match the width query string you added to your image's URL. For example, the output might be:
Image Width: 200
Configure File type and routing settings
The File type and routing settings determine whether to use default Fastly IO settings to process images or to use the VCL you set up. To adjust the File type and routing settings:
- Log in to the Fastly control panel.
- From the Home page, select the appropriate service. You can use the search box to search by ID, name, or domain.
- Click Edit configuration and then select the option to clone the active version.
- Click Image Optimizer.
- Click Edit settings.
- Scroll to the File type and routing settings and select Advanced.
- Click Save.
