Optimize your images with Fastly IO
Use Fastly Image Optimizer to deliver high performance images.
Images typically make up a large portion of the data transferred when users visit a site, and for good reason – images can be key to creating a compelling user experience! Striking a balance between quality and performance can be a real challenge.
By delivering your assets through Fastly Image Optimizer (IO), you can generate multiple image variants for user devices and screen resolutions from a single source and apply transformations at the network edge. Optimizing your images can make your website faster, improve your UX, and reduce the amount of storage you need.
HINT: If you don't have a hosted website yet but want to try Fastly IO, you can clone the example GitHub Pages site, and follow the steps in the README. Check out the deployed version with some demo image transformations: github-pics.global.ssl.fastly.net/pics-site/.
If you're a Postman user, you can pop a Fastly API key and your origin address into the collection and run it to set up an Fastly IO service.
Enable Image Optimizer on your account
Once you've signed up for a free Fastly account, you can enable Image Optimizer for your account. Image Optimizer is included with your use of Fastly up to certain limits. For more information, refer to the billing details.
To enable Image Optimizer on your account:
- Go to Account > Billing > Products.
- Open the Network Services section.
- Next to Image Optimizer, click Purchase.
- Read through the pricing and purchase details, fill out relevant billing information, then click Purchase now.
The enablement process begins, which may require a short wait while Fastly processes your request. Once you've enabled Fastly IO for your account, you have the choice of when to enable it for a particular service.
Create a service
If you have an existing Fastly service you want to use with Fastly IO, open it in the Fastly control panel. If you plan to use the API to set up IO, copy your Service ID - you'll need it and an API key for your account (you can set them as environment variables or include them directly in the commands). You can move on to the next step.
If you don't have a service for your website or application yet, create one now in the Fastly control panel or your developer environment:
- Fastly control panel
- API
Click Create service and select CDN. Fill out the fields as follows:
Enter a Service name.
Enter a Domain you plan to route through Fastly, for example
www.your-domain.com, or a Fastly test domain, for exampleyour-test-site.global.ssl.fastly.net.
NOTE: If you're using your own domain, your traffic won't pass through Fastly until you update your DNS records, but you can test your service at a domain Fastly assigns first.
Enter your origin Host. This should be the location your images are stored at.
HINT: If you’re using a developer platform that provides hosting at a subdomain for your project or bucket, enter that address, for example:
your-bucket.s3.us-east-2.amazonaws.com. If you bought a hosting package from a provider who perhaps also sold you your domain, your origin host will be either at the apex domain or at a subdomain you created, for example:origin.your-domain.comLeave the default settings in place and then select Activate on Production from the Activate menu!
Wait a minute or so then check that your service is working by clicking Test domain to visit the deployed site in your browser – it should return the content stored at your origin host.
Enable Fastly IO for your service
Enable Fastly IO for your service to optimize the images you're delivering through Fastly.
- Fastly control panel
- API
- From the Home page, select the appropriate service. You can use the search box to search by ID, name, or domain.
- Click Edit configuration and then select the option to clone the active version.
- Use the Fallback location menu to select the geographic location closest to the origin where your images are stored. This will help determine the optimal shield location for any requests for Image Optimizer transformations that need to go back to an origin that doesn't have shielding enabled.
- Click Enable Image Optimizer.
- Click Enable on all versions to confirm you want to enable Fastly IO.
Apply Image Optimizer to requests
When people visit your website, Fastly can make changes to the requests and responses. As your traffic passes through Fastly, it can check for specific types of request and carry out actions on them. We're going to specify a header to tag requests we want to run Fastly IO on, and a condition to indicate when Fastly should add the header. We'll run IO when the request is for an image, which we can tell from the file type. We'll optimize GIF, PNG, JPEG, and WebP assets:
- Fastly control panel
- API
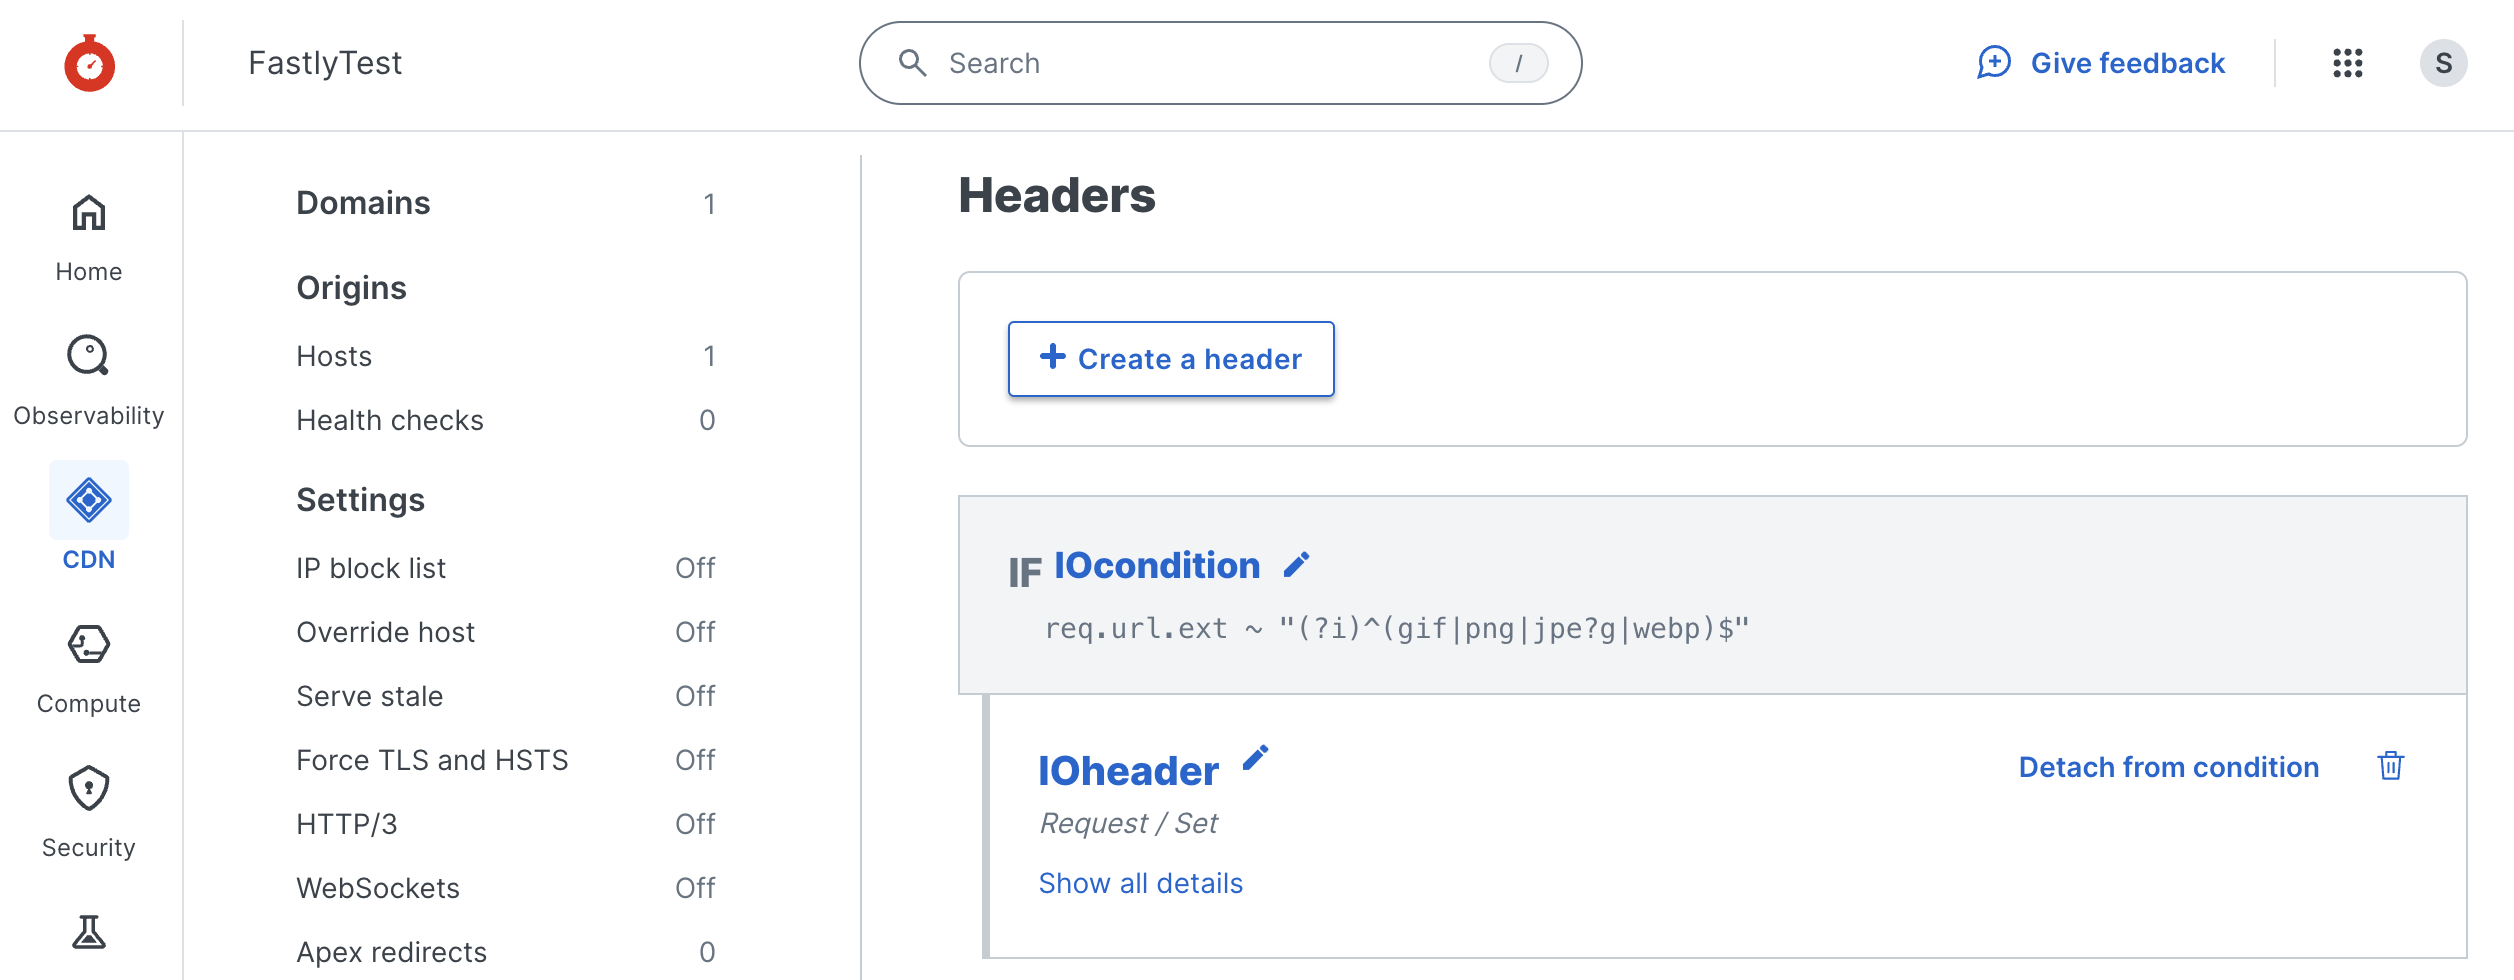
In your service configuration, select Headers and click Create a header.
- Enter a Name of your choice.
- In Type / Action, choose Request and Set.
- For Destination, enter the following:
http.X-Fastly-Imageopto-Api - For Source, enter
"fastly"(including the quotes). - For Ignore if set, choose No.
- For Priority, enter
1. - Click Create.
Click Attach a condition next to your new header.
- For Type, choose Request.
- Enter a Name of your choice.
- For Apply if, enter the following:
req.url.ext ~ "(?i)^(gif|png|jpe?g|webp)$" - Save and apply your new condition.

Activate your new service version to try your images!
If the condition applies (whenever there's a request for an image), Fastly will add the IO header and carry out the optimization.
Use image parameters
We've successfully set things up so that when someone visits your site and the request includes a link to an image you're delivering through the Fastly service, Fastly IO will carry out any transformations you specify. Give your service a minute to update, then try loading one of your images in the browser:
Use the domain you added to your service, like www.your-domain.com or your-test-site.global.ssl.fastly.net followed by the image path and name.
You can apply the Image Optimizer defaults you set by loading images from the domain in your Fastly service and optionally add optimization query parameters to individual image URLs in your website markup. Here's an example image URL with parameters:
https://github-pics.global.ssl.fastly.net/pics-site/jampal.png?saturation=-100&orient=h

🖼️ You can use lots of different parameters to tailor your image optimizations – try them in your site!
IMPORTANT: Your image links will only work with the optimizer using the correct URL.
- If your
imgelements are using relativesrcattributes, you can just visit the site through the domain you added to your service (after updating your DNS if it's your own domain). - If you're using absolute references for your images, perhaps because they're stored at a different domain from the rest of your site, you'll need to update your markup to use the domain in your Fastly service (and ensure you have the domain the images are stored at in the service as an origin host).
Choose an image optimization strategy that suits your site:
- Use the
srcsetproperty in your HTML to support different displays with a single source file stored at your origin instead of creating and storing multiple copies of each image. Fastly will generate, deliver, and cache the optimized versions on demand, saving both time and resources, especially for large, media-rich websites. - If you want to apply IO to a particular directory in your site, you can specify that in your condition.
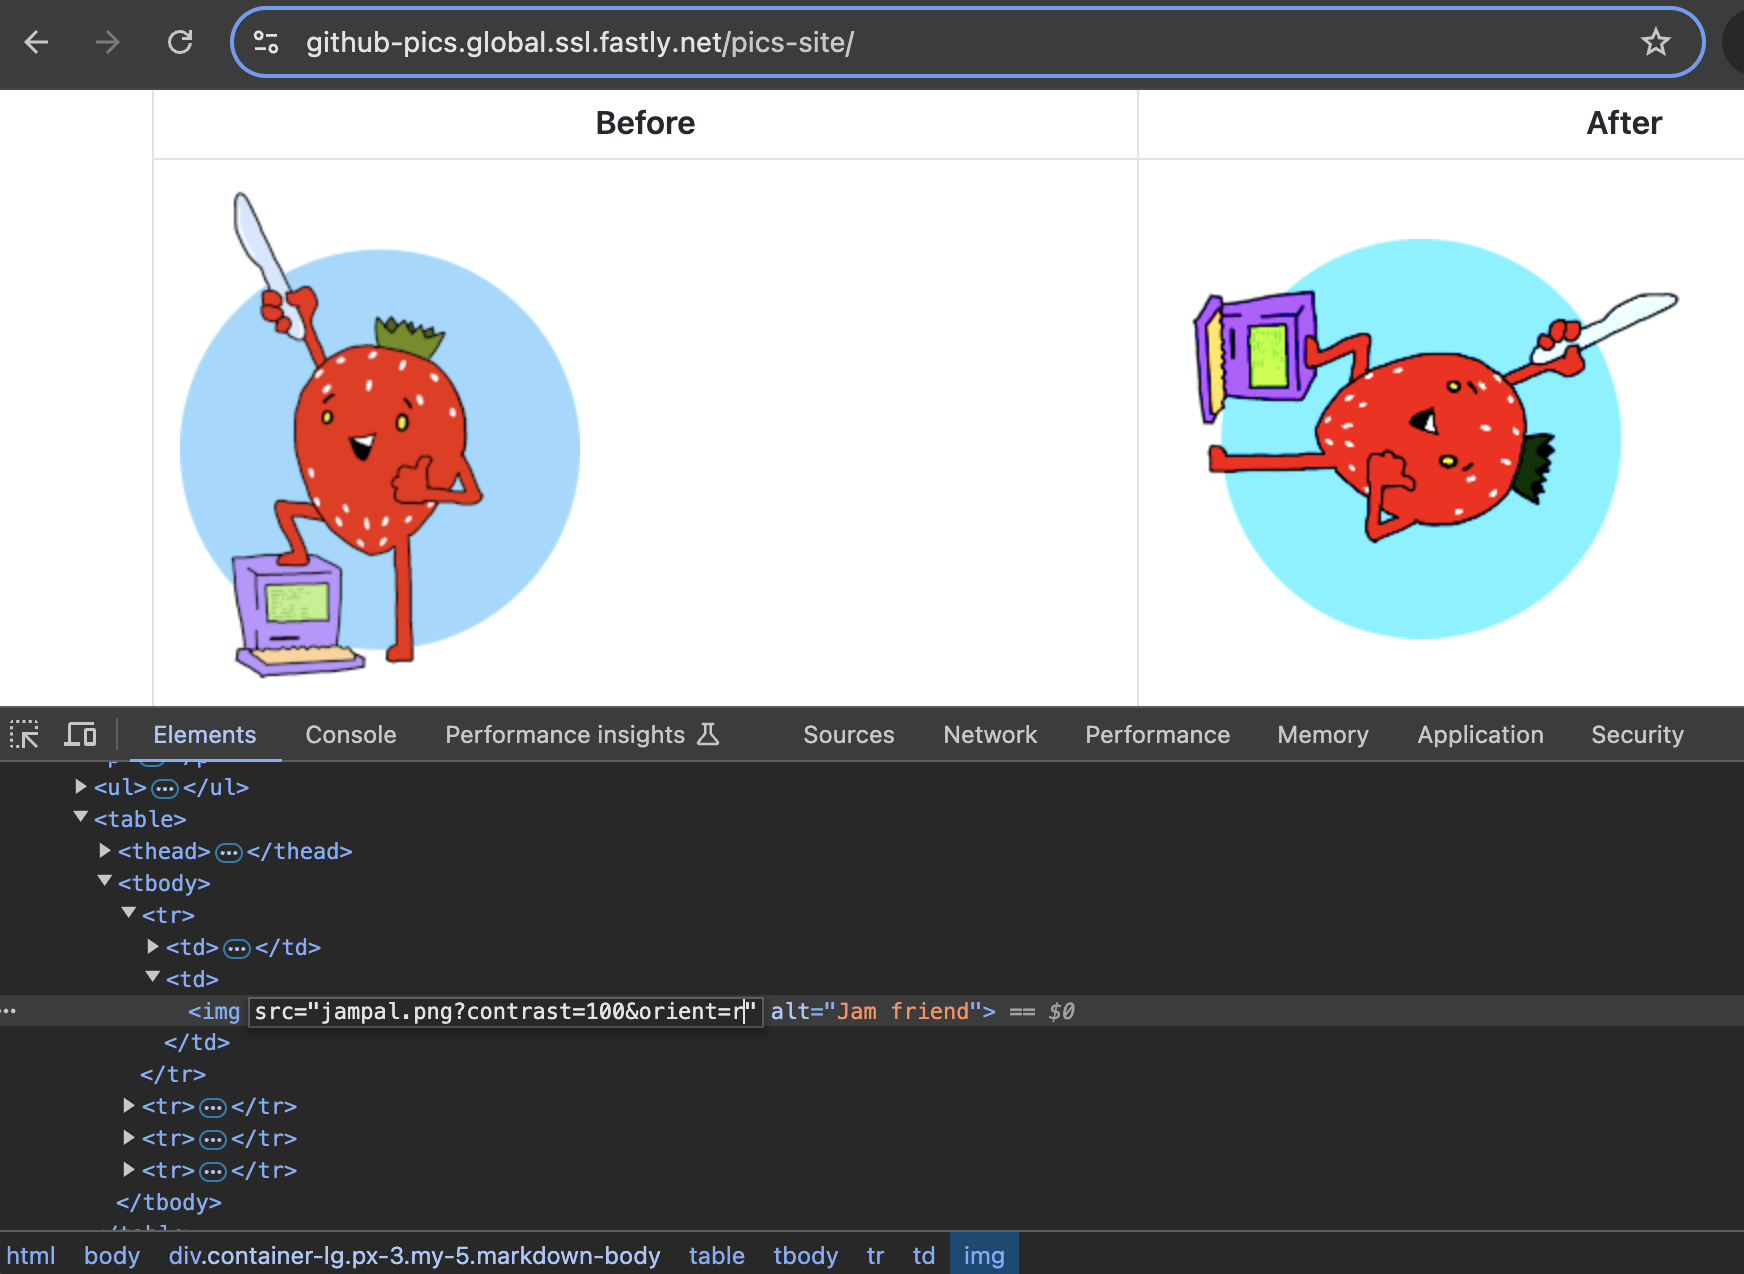
You can use your browser developer tools to experiment with the image parameters. In Chrome right-click or control + click and choose Inspect, then try changing the img src attributes:

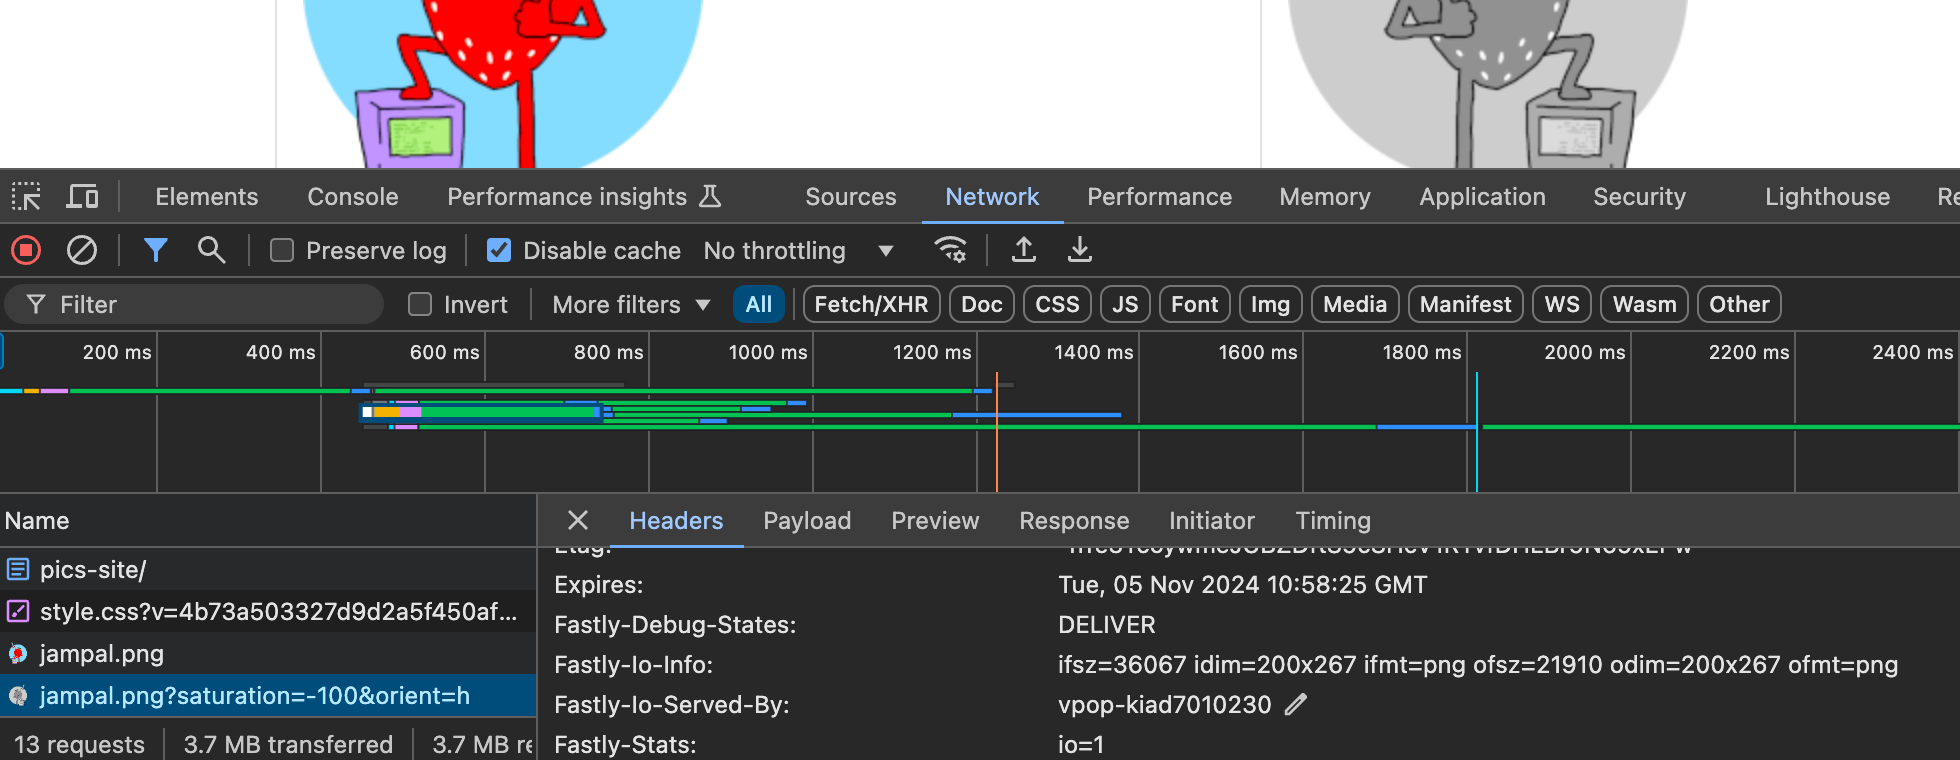
Use the Network tab to discover more about your image requests by reloading the page and scrolling through the list – check out the difference in size when your images are optimized:

Select an image and scroll through its Headers to find out more about what's happening on the Fastly network:

What's next
Continue exploring what Fastly Image Optimizer has to offer with these examples and tutorials: